
This program will teach the player about how to navigate a spaceship to the moon. It will be playable over the Web.
Building Your Rocket
The first thing the player must do is build his rocket ship. It will have three stages and the payload (the moon lander) on top. The first stage gets you into a “parking orbit” close to the earth; the second stage takes you to the moon; and the third stage slows you down and lets you land on the moon. If you land safely on the moon, you win! Here’s the screen where you design your rocket:
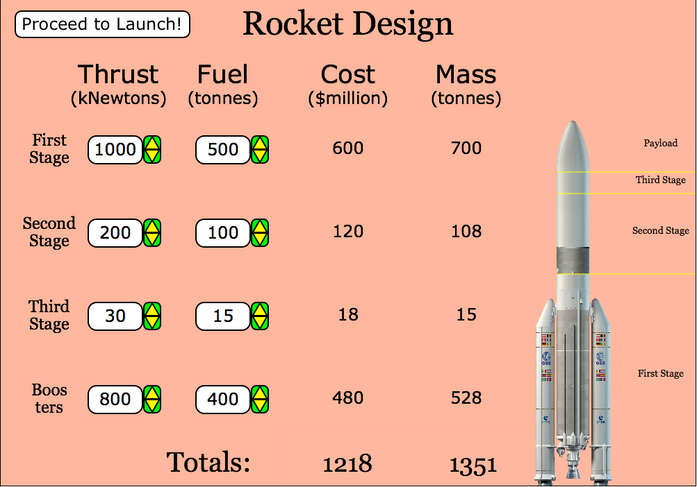
You specify the engine thrust (how big the rocket engine is) and the amount of fuel for each of the three rocket stages as well as the solid rocket boosters strapped onto the side of the main rocket. This will determine the total cost and the mass of the rocket. Obviously, you want to minimize the cost, but you also have to have engines big enough to do the job.
Once you have decided on the right sizes and fuel allocations for each of the stages, you press the “Proceed to Launch!” button.
Launching the rocket
This is the screen where you set the launch parameters:
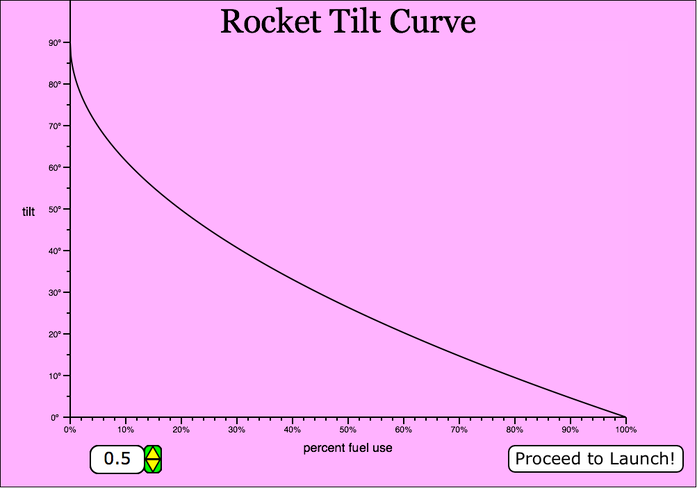
It’s very simple: the rocket on the launch pad is tilted at an angle of 90º: straight up. When it reaches orbit, it has to have a tilt angle of 0º: parallel to the ground. All you have to do is decide how quickly the rocket should tilt from its initial 90º heading. You do this with the little controller on the lower right. The smaller the number is, the more concave the tilt curve will be. If you set it to 1.0, then the tilt curve will be a straight line sloping down from 90º to 0º. If you set it to larger than 1.0, then it will bulge upwards.
When you’re satisfied with your tilt curve, you press “Proceed to Launch!”
Launch animation
This is the screen that you’ll see for launch. There’s nothing for you to decide in this screen; you press the “Launch” button and the rocket takes off. If you’ve made the first stage too weak, then your rocket will crash back to the ground. If you’ve made it too strong, then the rocket will go into a higher parking orbit than you need — all you did was waste money.
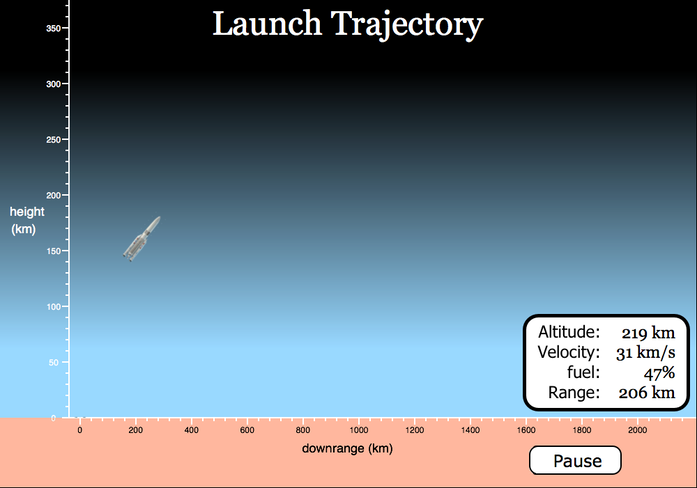
(Er… you might notice that the numbers don’t look right. Hey, this is just a screen mockup.)
Translunar Injection Phase
This sounds really neat, doesn’t it? It’s really quite simple: you must decide the point on your parking orbit where you intend to fire the second stage. Two things decide if you will make it to the moon:
1. If you start the burn at the right position;
2. If you made the second stage the right size and gave it the right amount of fuel.
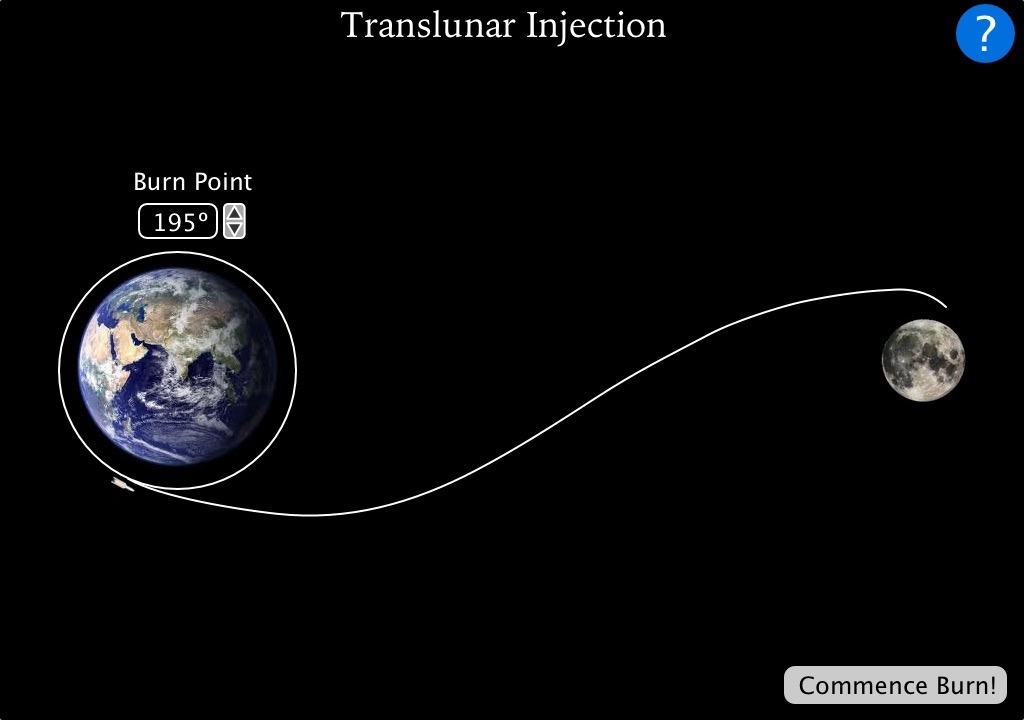
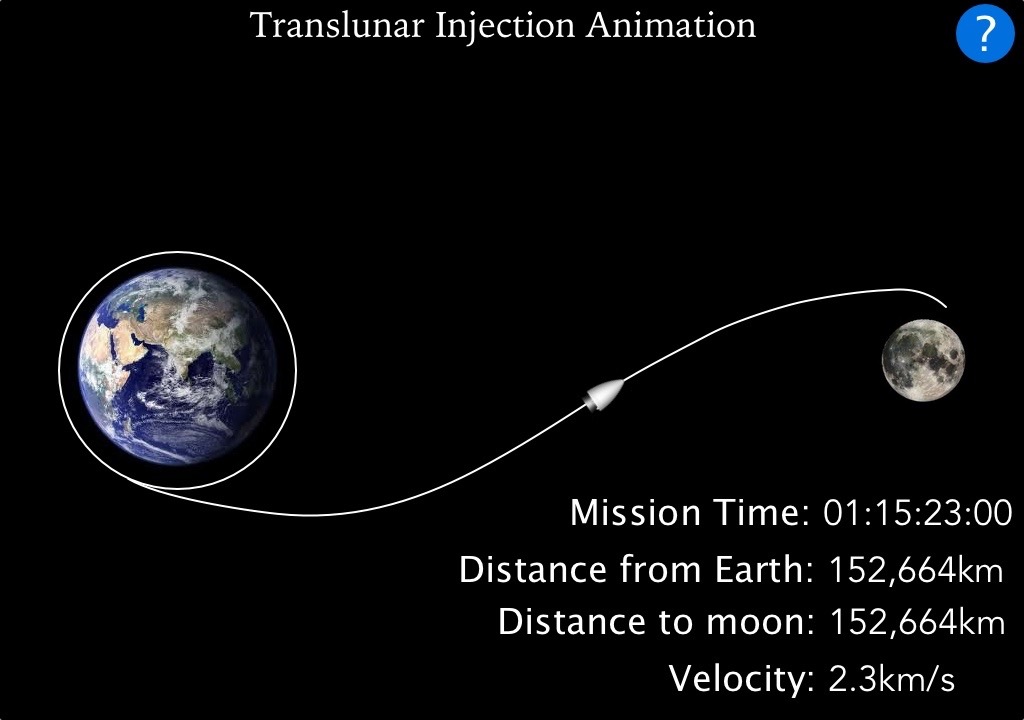
If you get either of these wrong, then your rocket will fly off into space. Goodbye, rocket! When you press “Commence Burn”, the rocket fires and you get to see an animation of the rocket’s trip to the moon:
Landing Phase
If you manage to get close enough to the moon, then you begin the last and most difficult of the phases: the landing phase:
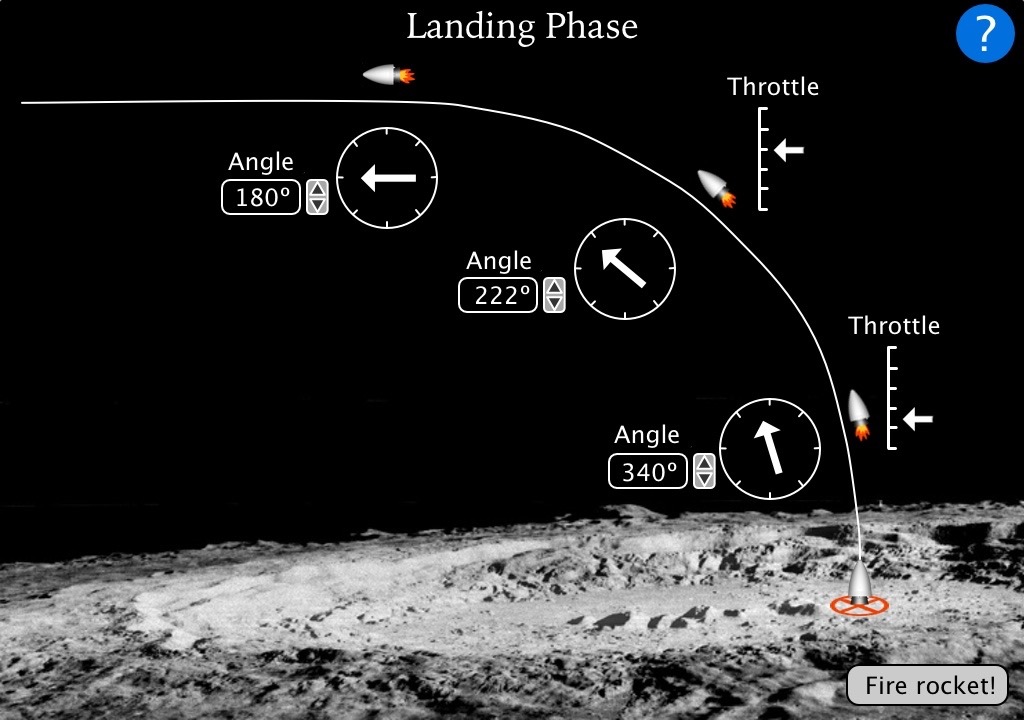
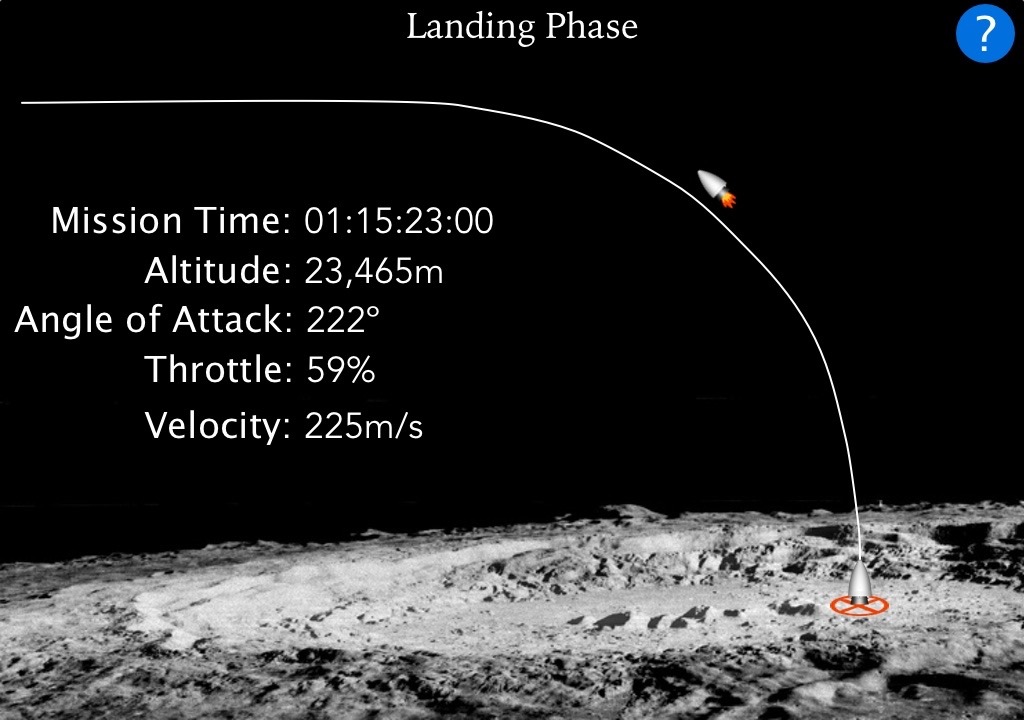
Here you plan out the tilt angles AND thrust settings for the rocket as it descends. You don’t get to do this in realtime; remember, you’re back on earth. You have to design the whole process in advance. If you plan the right tilt angles and thrust settings, then you’ll land safely. Otherwise, you’ll make a new crater on the moon. Once you’ve made your settings, you press “Fire Rocket!” and see an animation of your attempted landing:
That’s all there is to it! Of course, getting everything right is really difficult. That’s why they call it “Rocket Science”.
Here’s the working software, rigged to insure that you win.
